

Conda on Colaboratory
Published December 5, 2022


ssurbhi560
Surbhi Sharma
Introduction
Hi, I am Surbhi, and this blog post is about the work I did over the last three most exciting months in my internship at Quansight Labs. My mentor during the internship was the very amazing Jaime Rodríguez-Guerra. The project I worked on during the internship was condacolab. We will shortly go into what condacolab is, but before that, let's understand a little about the two familiar names that we see here, which are conda and (Google) Colab, and also why we needed condacolab in the first place.
Why condacolab? 🐍
Google Colab is a product from Google Research and is widely used by software developers and data scientists today. Some reasons behind its success are:
- It provides a cloud-based platform to run your code. This means it is not limited by the user's computer resources (like RAM, disk space, CPU, or GPU).
- It comes preinstalled with the most popular Python packages.
- Its free plan is enough for a lot of use cases.
- The resulting notebooks can be easily shared.
However, some users might find that Colab has some limitations in some areas, like:
- Colab is locked to a single Python version (3.8 at the time of writing). So, if you need to use any other Python version in Colab, you won't be able to do that easily.
- Colab ships many preinstalled packages, but users can only use
aptorpipto update or obtain new ones.
This means you won't be able to use any other package manager like conda, which can be a better option for certain projects and data-science fields. You might be able to get conda to work on Colab after some hacking, but this kind of workaround tends to break often and lacks reusability.
To help folks with these limitations and make Colab more user-friendly for conda users, we have condacolab.
What is condacolab, and how does it work?
condacolab is a tool that lets you deploy a Miniconda installation easily on Google Colab notebooks. This enables you to use conda or mamba to install new packages on any Colab session.
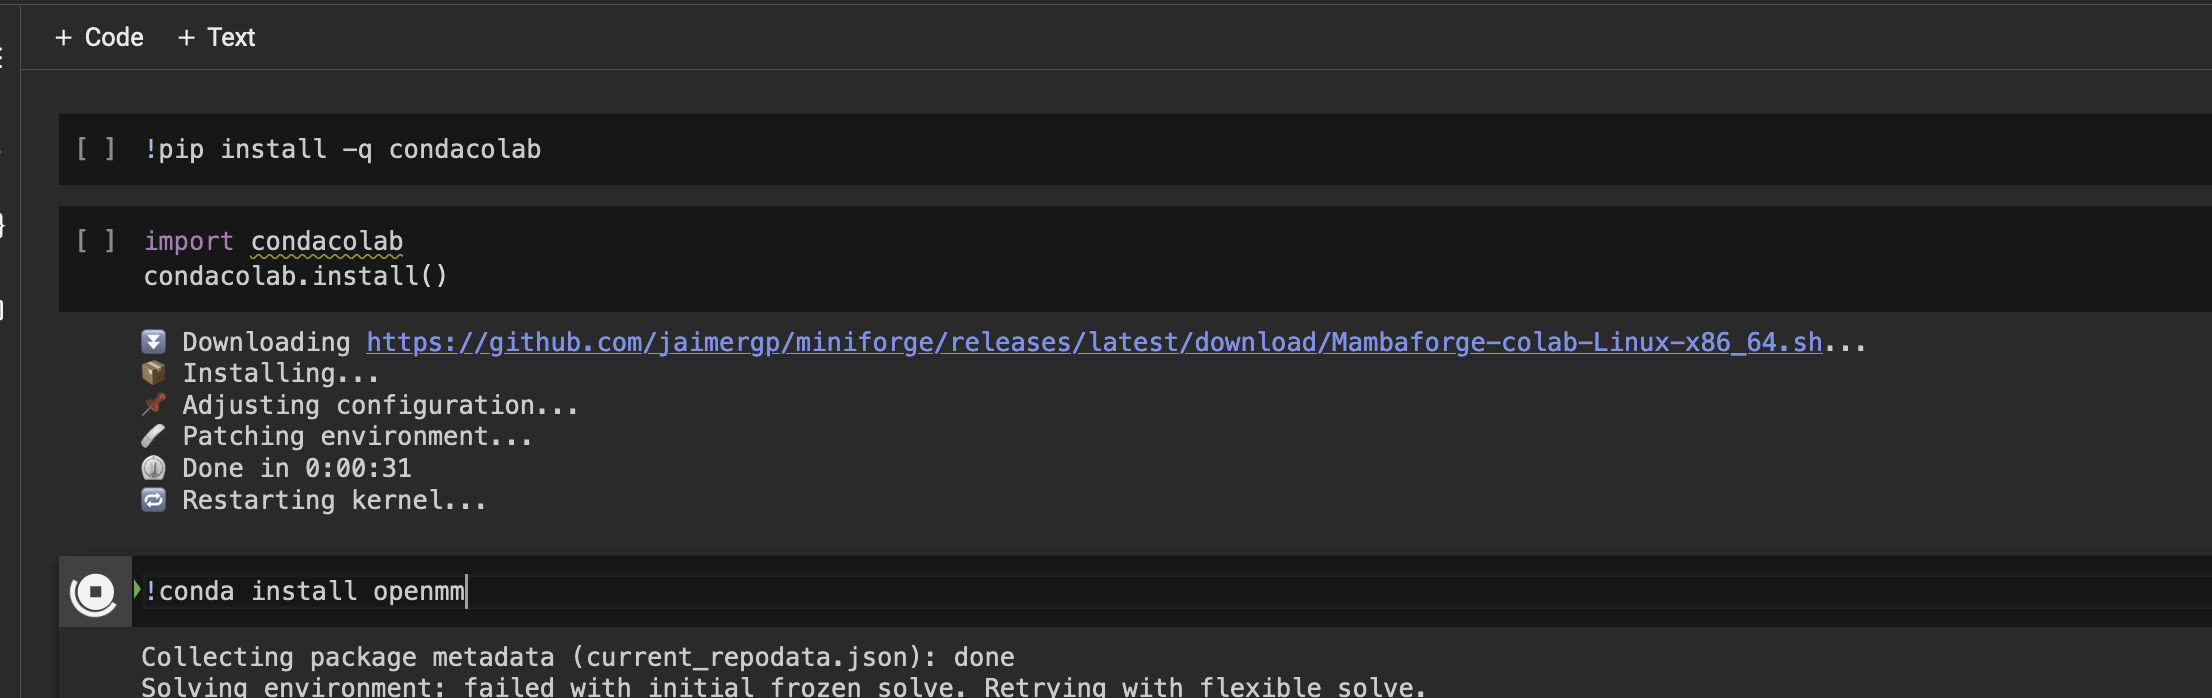
The way condacolab worked before was by installing the Miniconda distribution on top of the system's Python at /usr/local, and then adding a few configuration files to ensure we never changed the currently installed Python version. Finally, it wrapped the Python executable to redirect and inject some environment variables needed to load the new libraries installed by conda. Since we need to re-read LD_LIBRARY_PATH, it also triggered a Jupyter kernel restart.
The problem with this approach is that we are still stuck with the preinstalled Python and we are overwriting the system's Python executable. This is not the best way because we are leaving some original Colab libraries that depend on other packages, resulting in a chaotic mixture of conda-provided files with Colab-preinstalled files. In most simple cases, this doesn't present much of a problem. However, if users rely on more complex packages with compiled dependencies, chances are you would often run into difficult-to-debug errors due to ABI incompatibilities.
Adopting a better solution 🥳
The first goal we worked on during the internship was to design and implement a more robust solution to use conda and/or mamba on Colab.
After some iterations, we settled for the following approach:
- We install the Miniconda distribution (or any other distribution) at
/opt/condainstead of/usr/local. - We supplement the
baseenvironment with Colab-required packages, likegoogle-colab,condatools,psutil, andmatplotlib. - We overwrite
/usr/local/python(the executable run by the defaultipykernel) with a shell script that activates thecondaenvironment and starts our customipykernel, forwarding the calls there. Thanks to this step, the Jupyter server will not even notice, but we are now runningconda's Python without touching the system one at all!
#!/bin/bashsource {prefix}/etc/profile.d/conda.shconda activateunset PYTHONPATHmv /usr/bin/lsb_release /usr/bin/lsb_release.renamed_by_condacolab.bakexec {bin_path}/python $@
Bash script which activates the conda base environment and then runs the ipykernel process.
Some other work we did for condacolab
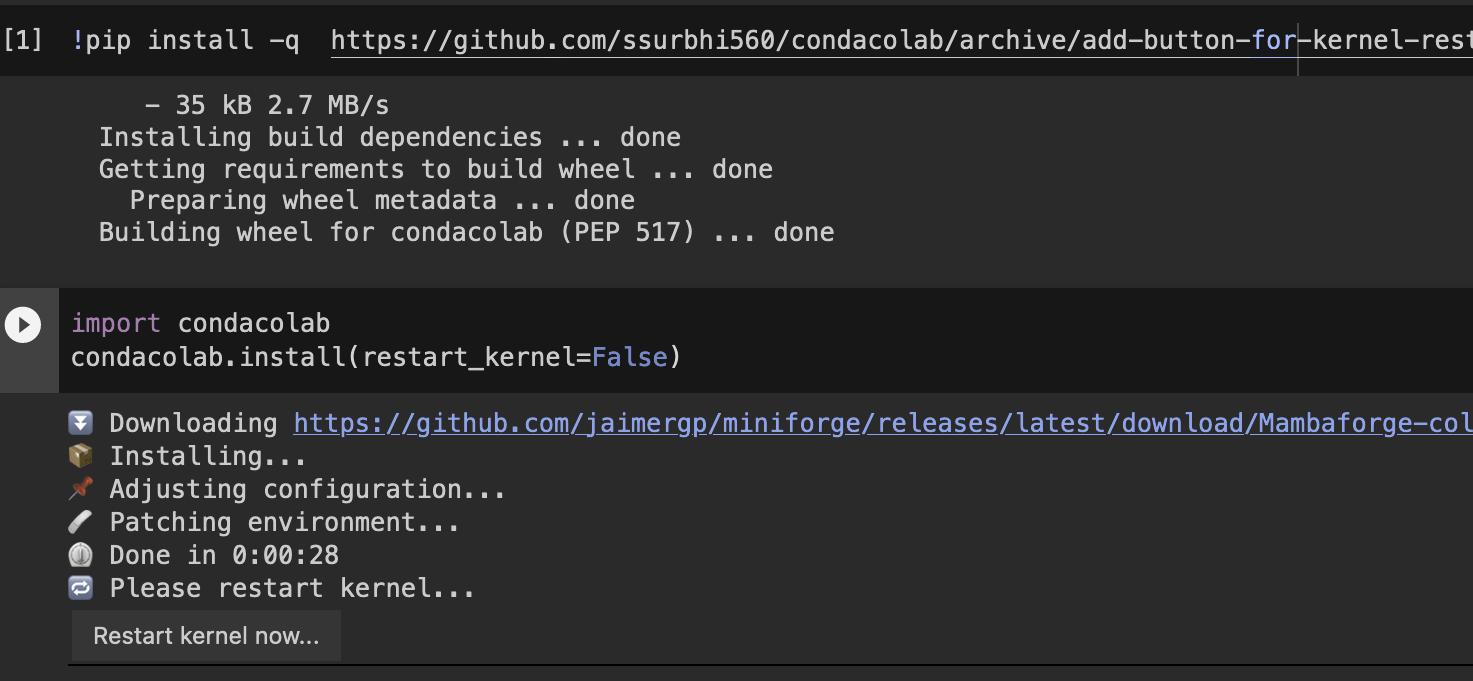
1. Adding a Restart kernel button
By default, during the installation of condacolab the kernel is restarted automatically. This could make users feel like something is wrong with the installation or Colab. We now added a button to restart the kernel to resolve this UX issue. If you set restart_kernel to False during the installation, then the kernel will not restart automatically. Instead, a button will appear, which you can click to restart the kernel.
2. API for customizing the conda base environment
We also worked on building an API that would give users the option to customize the newly activated conda base environment during the condacolab installation. The API provides the following options that users can specify:
environment_file: This can be a URL or path to anenvironment.yamlfile.specs: This is a list of additional specifications (packages) to install.python_version: Python version to use in the condabaseenvironment.channels: Comma-separated list of channels to use in the condabaseenvironment.pip_args: List of additional packages to be installed usingpip.extra_conda_args: This is a list of any extracondaarguments used during the installation.
The PR with the ongoing work for this has been opened here: API for customizing the conda base environment (#38)
condacolab.install( environment_file="https://raw.githubusercontent.com/ssurbhi560/condacolab/07b92d827/environment.yaml", python_version="3.10", specs=["matplotlib", "numpy"], channels=["conda-forge", "bioconda"], pip_args=["blue"] extra_conda_args=["-yq"] )
This is how users will be able to use the API while installing condacolab.
3. Custom installers built with constructor
As mentioned above, in the new solution we are using for condacolab, some extra packages are also installed (not just the ones shipped with Miniconda), which has increased the time for the installation of condacolab. So, to save some time during the installation and make condacolab faster, we are planning on pre-bundling these extra dependencies in custom installers built with constructor.
My learnings and acknowledgements ✨
During my internship, I met many intelligent and cool folks at Quansight, and interacting with them helped me develop a new perspective. I am so grateful for the wonderful and invaluable experience I had during the internship. The various things I learned and discovered don't include just technical skills but also skills like better communication, collaborating, overcoming the imposter syndrome, debugging when you are stuck, and so many more. Thanks a ton to all the people who made this internship program possible. And a special thanks to Jaime for being the coolest mentor I have ever had, always helping and giving advice when I was stuck, cracking the wittiest jokes, and making our calls and work fun.

