

Pydata/Sparse: Maintenance and docs overhaul
Published September, 2024


DeaMariaLeon
Dea Leon
Hi, I'm Dea María Léon. I had the pleasure to work at Quansight Labs for three months. The objective was to perform maintenance tasks and a documentation overhaul to the sparse project. In this post, I'll describe the work during that time.
Introduction to pydata sparse
sparse is a library that implements operations for sparse arrays with an arbitrary number of dimensions.
Sparse arrays or matrices are an important concept in scientific computing. These types of arrays are mostly filled with zeros. There are different formats to represent them in a compressed way. This translates to using less memory to store them.
There is a wide range of applications that benefit from these sparse arrays, from machine learning to electronics, and beyond. There are other projects that also implement these type of arrays.1
Users of sparse include Dask, XArray and SciPy. At the time of writing there are about 130+ packages that use it.
Matthew Rocklin started the project and Hameer Abbasi took over in 2018. I worked with Hameer, an expert in the topic.
Documentation overhaul
Convert the documentation website to Material for MkDocs
sparse documentation website was originally done with Sphinx. Both Sphinx and Material for MkDocs are static site generators and are used to create technical documentation.
One of the benefits of the conversion was that Sphinx requires writing input documents in reStructuredText format2. This is more complicated than using regular Markdown, the format used by Material for MkDocs. In addition, the learning curve to use Sphinx for new contributors is steep.
Another benefit is that Material for MkDocs can be highly customized as it supports several extensions and plugins. It's installed on top of MkDocs and extra style can be added.
Details of the conversion
When Material for MkDocs is installed, MkDocs is also installed as a dependency. The addition of plugins lets you customize the front-end.
By adding the mkdocstrings
and the mkdocs-gen-files plugin, the API Markdown files are generated automatically at build time. When new python methods and classes are added to the project, no new documentation files need to be manually written. They don't need to be added to the configuration file either.
mkdocstrings handles different languages. It does it with the handler mkdocstrings-python which in turn uses Griffe. These and other plugins also manage the links across pages and sites, grouping class members, and table of content. Markdown extensions manage admonitions, code blocks and data tables.
Part of the conversion included adding the Markdown files that were not part of the API. These are the pages with the Introduction, how-to guides, etc. The content of these files was the same than the original files for Sphinx. But I needed to adapt their format so that they could be rendered properly.
It was also necessary to link to other projects like numpy, python and scipy when referring to specific functions. This was done using a feature called "inventories" on the original Sphinx site. An equivalent feature in Material for MkDocs is available, but it is handled differently. This is done by the mkdocstrings-python handler, and links to the inventories must be added to the settings file mkdocs.yml.
Some of the features I added to improve the final documentation website were:
- The
mkdocs-jupyterplugin, which lets python files to be run and rendered as notebooks on the site. These python files were examples that already existed in the repository but were not being run nor shown in the previous website. - The
KaTexlibrary with the pymdonx.arithmatex markdown extension permits LaTeX mathematical formulas to be rendered. - To add some style to the main theme I added extra
css. I wanted the site to look better from the default theme to improve the user experience. I also included card grid and the logo to the home page.
All the dependencies that I added for the documentation are included in the pyproject.toml file. The plugins, extensions and settings are in the mkdocs.yml file.
Deployment to Read the Docs
Material for MkDocs is designed to be deployed on GitHub Pages. It works "out-of-the box" with it. So, deploying it to ReadtheDocs which is a documentation host, took some experimenting. But keeping the site there, meant that the previous releases (done with Sphinx) would still be available.
The first step to deploy to Read the Docs is to create an account and authorize its access to the GitHub account. The authorization means that Read the Docs will be able to install webhooks to the GitHub repository.
Normally, the project must be imported to Read the Docs. Since the old site was already deployed to it, I didn't have to do this step for sparse. But to make sure I understood the whole process, I first deployed my own fork of sparse. This turned out to be very useful later.
I was given "Admin" rights to sparse in the host (Read the Docs), and I activated the "trigger builds from pull requests". This is the feature that lets us preview the documentation builds with each commit in GitHub with a link.
The tricky part was that Hameer, the owner of the project on GitHub, also needed to link his Read the Docs account to GitHub.
If I had started by deploying sparse directly, without installing my own fork first, it would have been impossible to find the missing part. The reason being that I didn't have access to all the project settings on GitHub. But I knew what was needed: to connect both accounts (GitHub and Read the Docs). This part was a good troubleshooting exercise.
At the time of writing, the new website is available only under the "latest" version on Read the Docs. The stable version is still the Sphinx website, as the next release is still not ready. But it will be part of the next release.
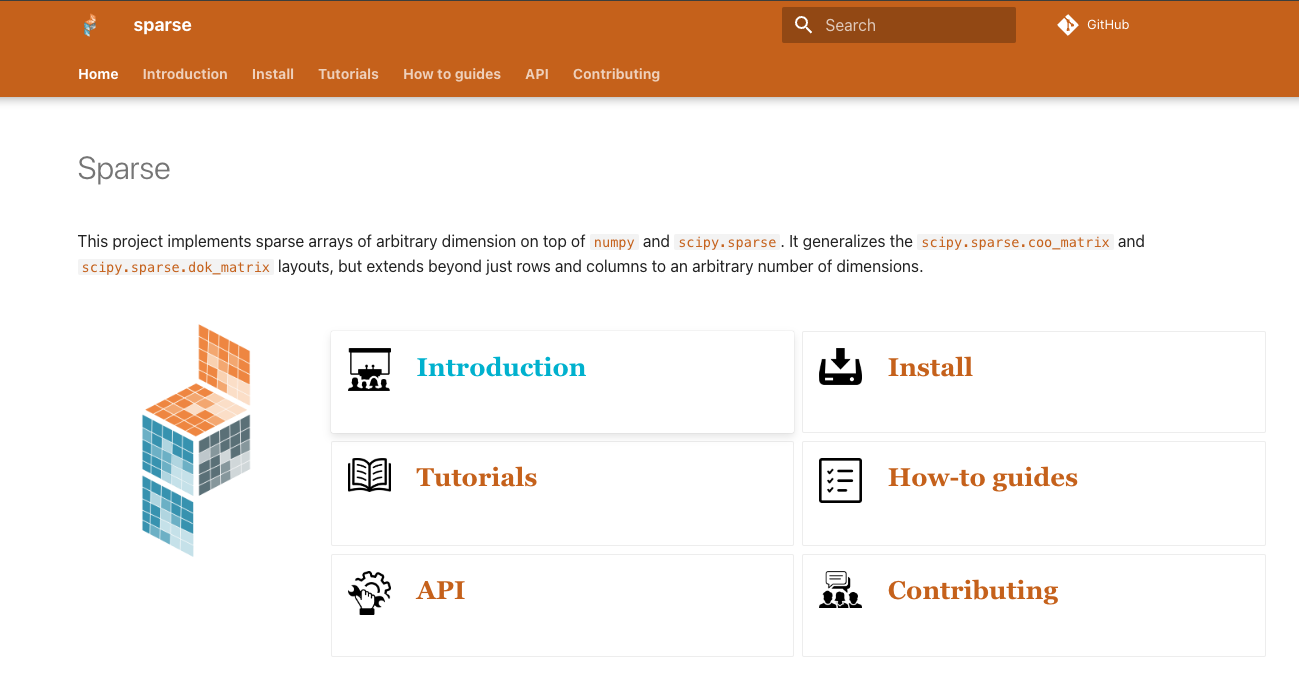
The resulting documentation site can be seen here.
Restructured the documentation
Once the documentation website was working with the new framework, I needed to reorganize it. The objective was to use the documentation guidelines from Divio's
These Divio’s principles state that the documentation should be structured in four sections. Each section should cover a different purpose and should be written differently. These sections are tutorials, how-to guides, explanations and reference (API).
The purpose of tutorials is learning. How-to guides should solve problems. Explanation pages should lead to understanding. And the reference should be the area where the comprehensive technical information is.
With these principles I divided the original content to match these guidelines. I also added the section for "contributing" and a specific section for the introduction.
Added missing docstrings
The final requirement related to the website was to add the missing docstrings so the API is fully documented.
Maintenance tasks
Added community tools to repository on GitHub
I added issue templates to the sparse repository on GitHub. I also added a pull request template and a release drafter. For documentation about these topics, please see here.
There are now four different issue template types: to report bugs, documentation issues, enhancement requests and question support.
As we know, these templates set a format and a structure to the information that contributors should provide when they open an issue or pull request. I set the templates up so that they add labels automatically.
The templates are configured in a YAML file, under the subdirectory .github/ISSUE_TEMPLATE. This file is a GitHub form schema, and it has the name of the fields and properties included on each template.
The Release Drafter is a GitHub action that can be found in Marketplace Actions. It must be added to the repository with a YAML workflow file. It is stored in .github/workflows/release-drafter.yml. After that, it needs to be configured with another YAML file, now with the name .github/release-drafter.yml.
Both files need to be in the main branch already in order to start working. Because of this, it is easier to add these files directly to the repository on GitHub than with a pull request. But that can be done only by the owners of the repositories. When someone who is not the owner of the repository creates the pull request to add them, the workflow fails. At the time of writing, the pull request must be merged like that. Once the files are in the default branch, the Release Drafter starts working.
With all this, a document that is the release draft keeps updating itself automaticaly when pull requests are merged. I included the option to categorize pull requests and it does it by setting labels to the pull requests, depending on their titles. For this, I added the "Autolabeler" funcionality. Please see visit the documentation for more info.
Improved and expanded benchmarks
Benchmarks in general are used to track and test code performance. When code is modified, the package or library being measured shouldn't run slower or take up more memory space. Benchmark tests are different than testing for bugs, although they can help to find bugs.
The sparse project already had benchmarks, but they were designed to be run by asv, a tool to benchmark performance. Plus, they were meant to be run by contributors locally in their machine. Thus, running the benchmark was not included in the CI workflow.
My job was to convert those benchmarks so they could be run and analyzed with CodSpeed, a different tool for benchmarks. For that, I had to install it first. I will describe shortly what the work involved.
When using CodSpeed, the benchmarks are run in the CI environment. Then the results are sent to CodSpeed servers to be analyzed. Running benchmarks in the CI environment (on GitHub) is normally something to avoid, due to the noise that could be introduced. But CodSpeed simulates CPU behavior, so the results measure CPU cycles. They include cache and memory access. To learn more details, please visit this section.
Like I said earlier, I needed to install CodSpeed. This is done by adding the pytest extension pytest-codspeed as a development dependency. Then, I added a GitHub Actions workflow to run the benchmarks and report the results to CodSpeed. The sparse repository needed to be imported to CodSpeed and enabled as well. To do this, one must have Admin rights of the organization on GitHub.
This is important as without these right, the tool does not run. Please see here.
Finally, I added benchmarks so they could be run by CodSpeed. The benchmarks are run whenever a pull request is opened and with each commit to it. A report is generated and posted as a comment on the pull request (on GitHub). The report has links to the analyses and graphs of the results in CodSpeed cloud.
Regarding the code of the benchmarks, CodSpeed works with pytest as I mentioned. So, we can use parametrized fixtures. The fixture benchmark runs CodSpeed.
We are now benchmarking matmul, elemwise and tensordot with CodSpeed. We are also comparing elemwise when using Numba vs. using Finch.
Acknowledgements
I would like to thank:
Hameer Abbasi who was my guide during this time. Mateusz Sokól, who also helped me very kindly at the beginning of the project. Melissa Weber Mendoça, who organized and supported us in many ways. Tania Allard who interviewed me for this temporary work. Everybody at Quansight Labs who was involved in making this program possible.
Update (Sep 30, 2025): Removed asv references per asv core maintainer request.
References
Footnotes
-
It is a special format required by
Sphinx. See reStructuredText for more info. ↩

