

Developing a Typer CLI for Nebari
Published November 7, 2022


asmijafar20
Asmi Jafar
Hey, I'm Asmi Jafar, a computer science postgraduate student from India. I've worked on the Nebari project (previously known as Qhub) during my three months internship at Quansight Labs.
🪴 About Nebari
Nebari is an open source project from Quansight that enables users to deploy a cost-effective and scalable data science platforms in the cloud. It uses an infrastructure-as-a-code approach to quickly and smoothly deploy a shared data science environment, on-premises or in the cloud of choice. For more details, refer to the Nebari docs.
Nebari Command-line Interface (CLI)
I worked on developing the Nebari Command-line interface (CLI) during my three months internship.
The Nebari CLI consists of various commands the user needs to run to initialize, deploy, configure, and update Nebari. Let's see briefly what each one of the nebari commands does.
Below is a diagram of the Nebari CLI commands.
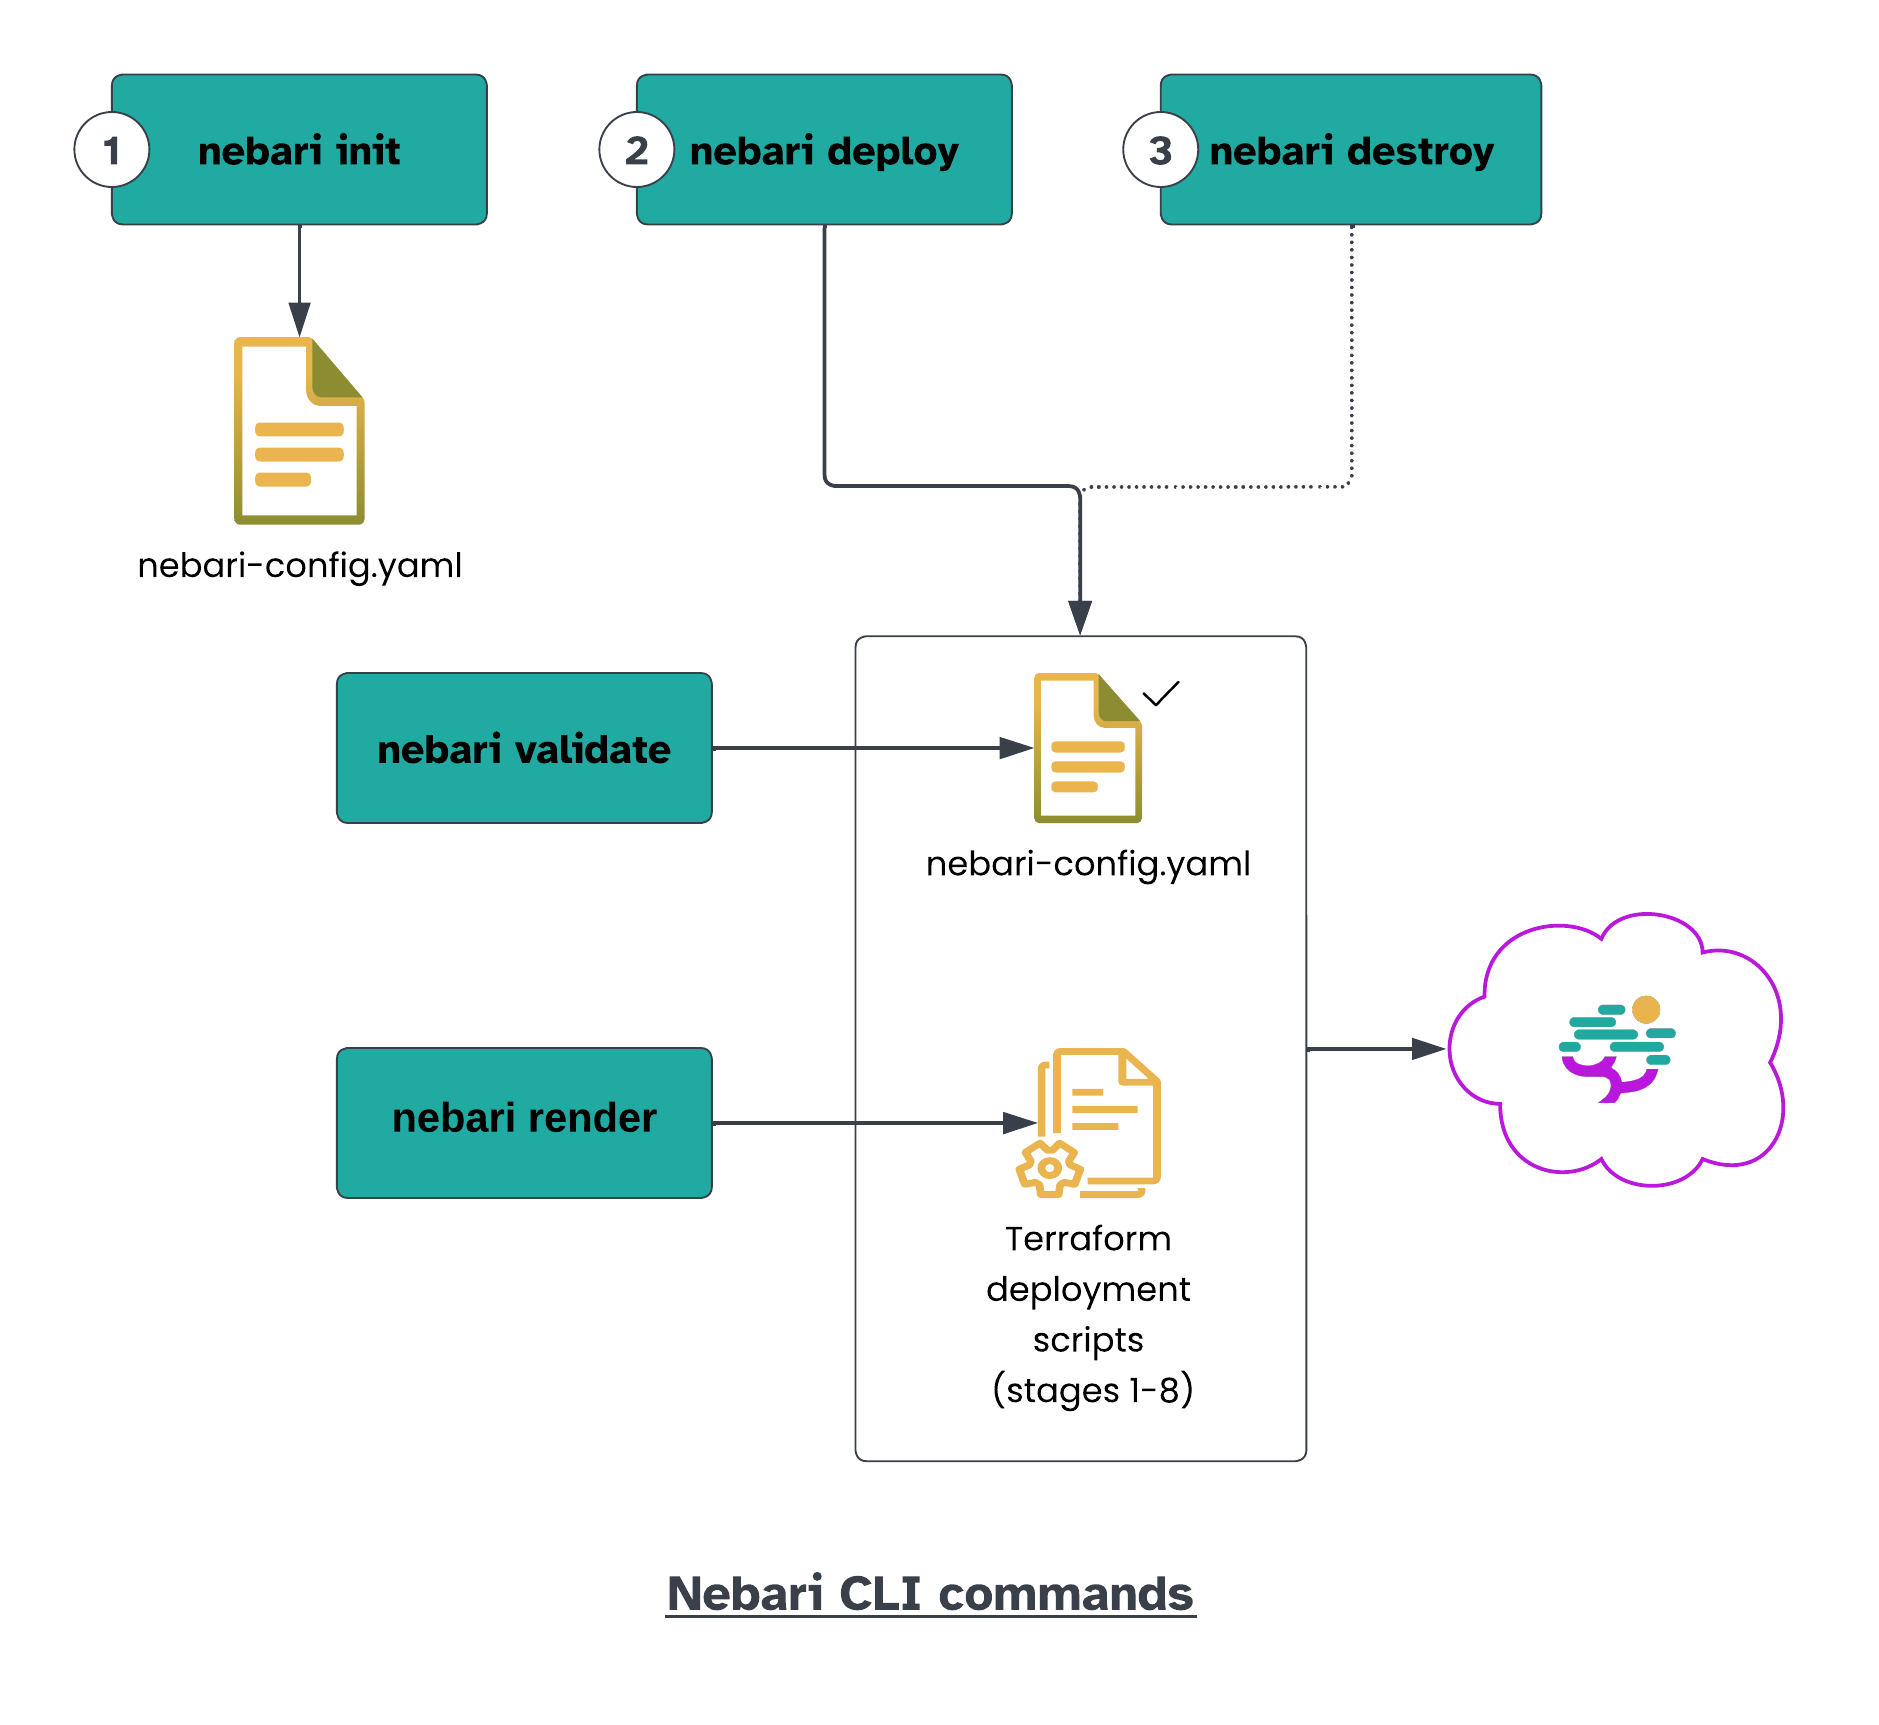
nebari initcommand: initializes and creates thenebari-config.yamlfile for the deployment.nebari validatecommand: validates the configuration filenebari-config.yaml.nebari rendercommand: renders the infrastructure configuration files (all terraform stages) and resources.nebari deploycommand: deploys the Nebari with all the resources and configurations set innebari-config.yamlfile.nebari destroycommand: tears down the provisioned resources for Nebari (the ones which were created during deployment).
✅ Initial steps
Prior to my internship, Nebari had an argparse-based command line interface which included all the functionality listed above. However it was clunky and, at times, a little challenging to use. My task as an intern was to improve the CLI experience for the end-user. After exploring various tools and libraries it was decided that we would proceed with Typer and Rich. For those unfamiliar, Typer is a Python library that makes CLI applications more interactive and user friendly. I started exploring features of typer and how it could be implemented as a replacement for the current CLI.
Initially it was hard to implement typer on the predefined functions of the CLI as it was important to understand how all functions fits together and their functionalities.
Prior to implementing the new Typer-based CLI, I spent some time trying to understand what each of the commands do and where the changes needed to be made. Once this was understood, I created a minimum viable product (MVP), shared it with the team and got the green-light to proceed.
In the next section, we will take a look at this new Nebari CLI.
🪴✨ Nebari Typer CLI
First, we have added a new nebari --help command to see all the commands and options available in the Nebari CLI.
`nebari --help`
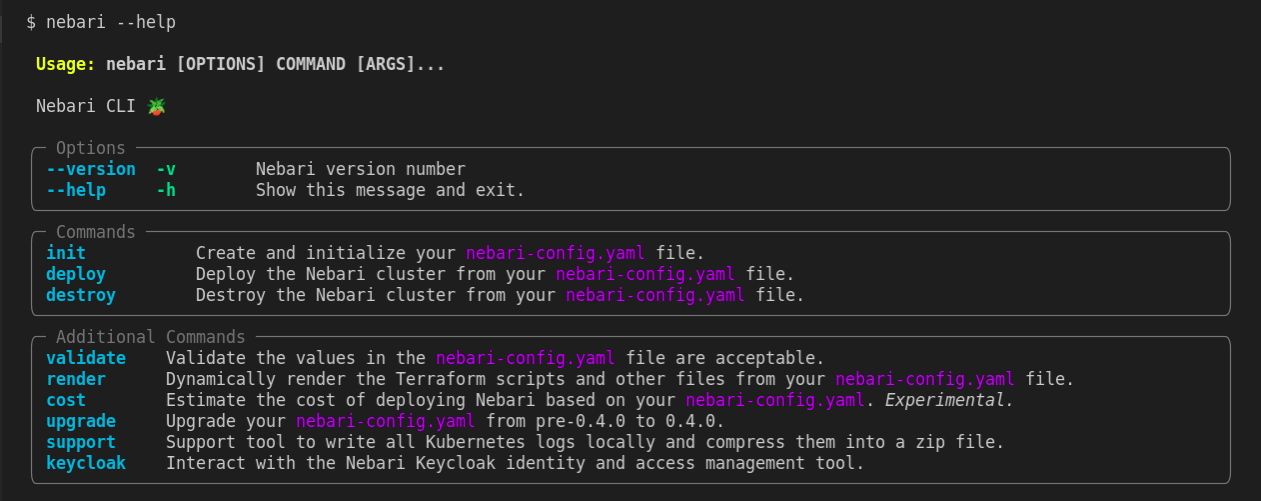 Output of the new Nebari CLI help command
Now, we will see the output of the nebari init help command to see all the arguments and options that are available to create and initialize a nebari-config.yaml configuration file.
`nebari init --help`
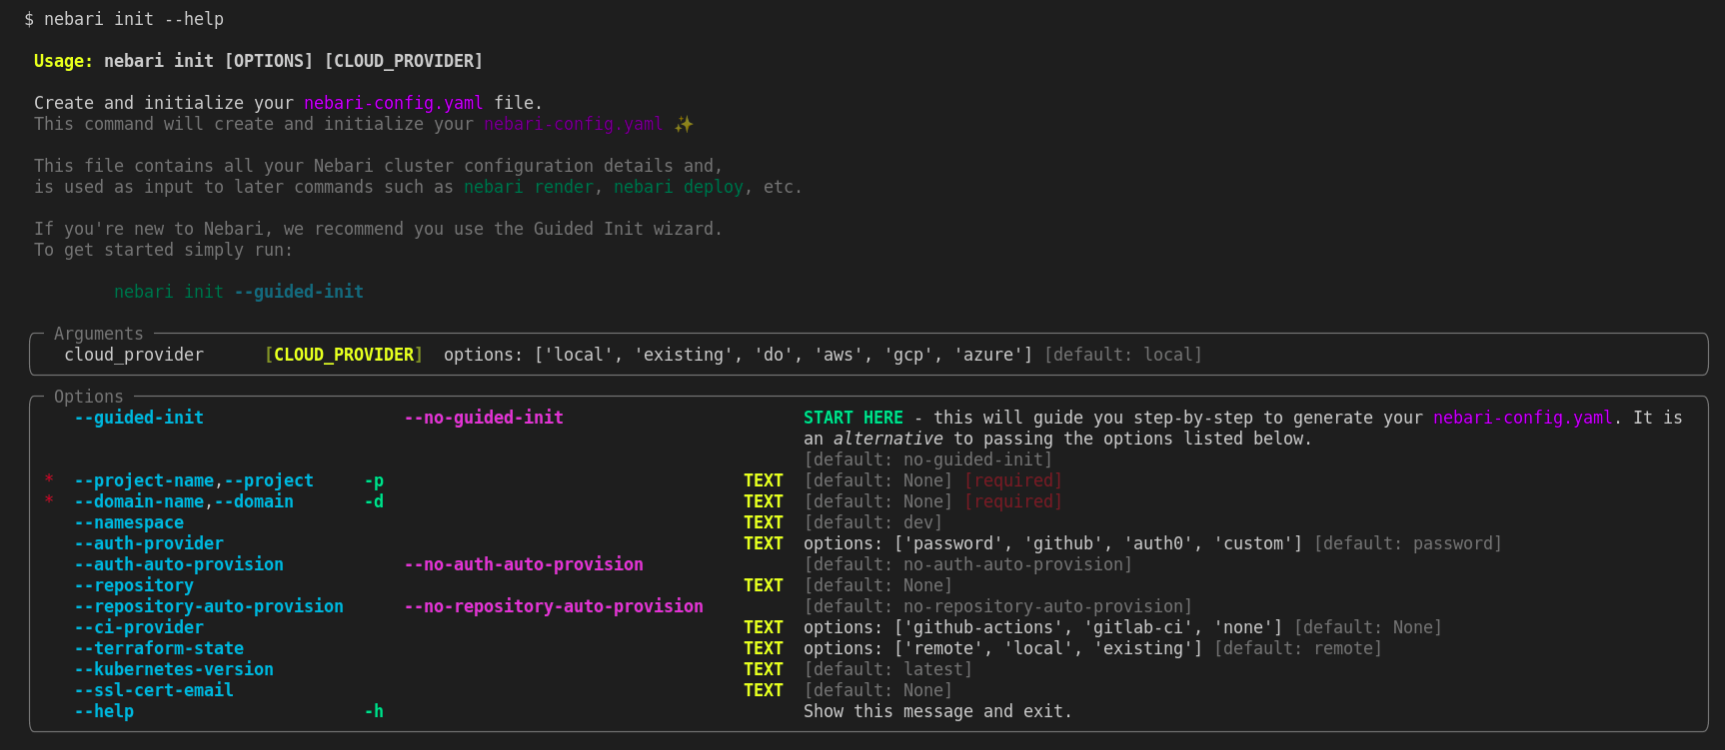 Output of the nebari init help command
The nebari init command has many available options. If a user is trying Nebari for the first time, it's hard to know what other each of these options represent. As a result, we implemented a helpful guided initialization wizard: nebari init --guided-init. This command guides the user through a simple questionnaire to provide helpful information and links for a number of important decisions that the user needs to make.
`nebari init --guided-init`


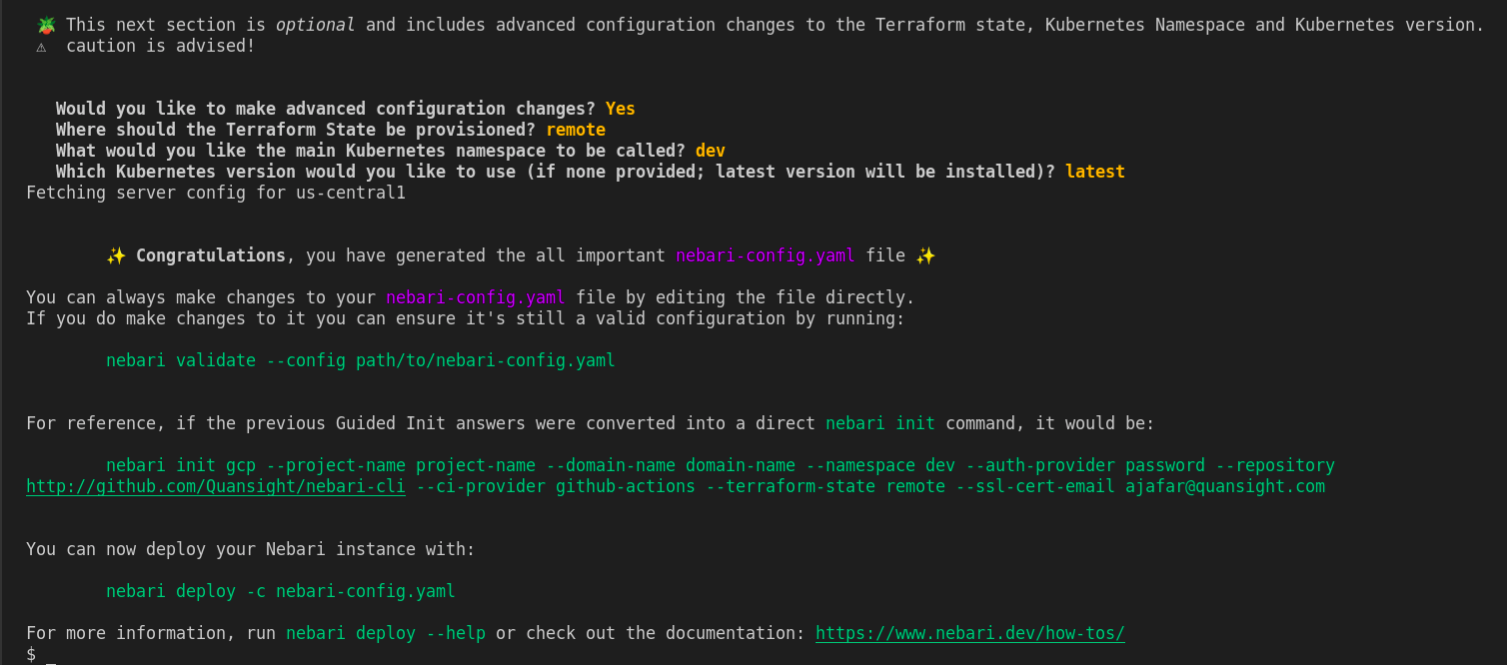 Output of nebari init guided-init command
This guided initialization wizard (equivalent to using nebari init with the appropriate flags) generates the all important nebari-config.yaml file. To help us generate this questionnaire, we used a package called questionary.
After generating the nebari-config.yaml, it's time to validate and render the Terraform scripts. To inspect how to use the validate and render commands, let's have a look at their respective --help commands.
`nebari validate --help && nebari render --help`
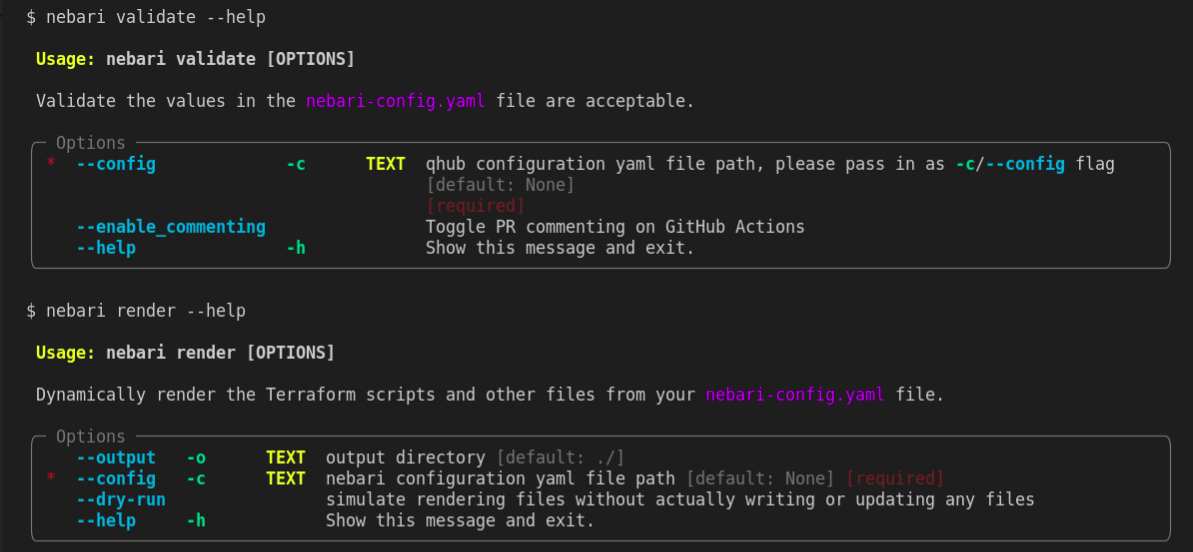 Output of the nebari validate and render help command
We need to pass the -c/--config flag to validate the nebari-config.yaml file and we need to do the same for render to generate the Terraform scripts.
`nebari validate -c qhub-config.yaml && nebari render -c qhub-config.yaml`
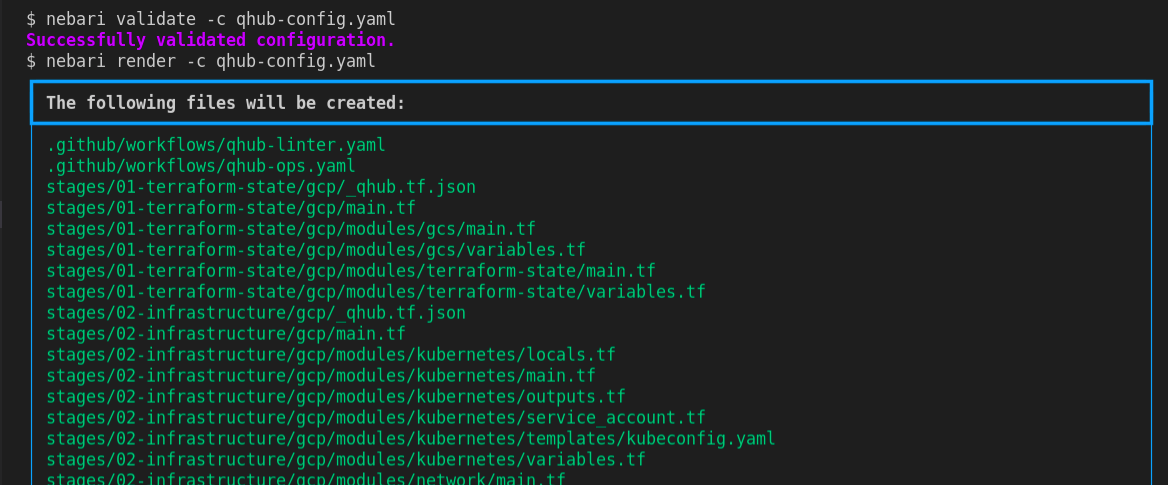 Output of the nebari validate and render command
These Terraform scripts are broken into stages and are stored in directory called stages.
NOTE: It's not necessary to run the validate and render commands separately as both commands are run under the hood by the deploy command.
Now we will see the output of the nebari deploy help command. The deploy command creates the necessary resources Nebari needs. Nebari also has a destroy command that works in a similar manner but instead of creating resources, it destroys them. The destroy command now requires confirmation, an important new feature. Previously it didn't ask for the confirmation and the cluster would start being destroyed right after executing it.
`nebari deploy --help`
 Output of the nebari deploy help command and destroy command
The deploy command also has a --config flag. Let's pass this flag to see the output of the nebari deploy command.
`nebari deploy -c nebari-config.yaml`
 Output of the nebari deploy command
😇 My Learnings and Acknowledgements
I learned a lot during my internship. First, I learned about Typer and Rich. Interacting with the command line interface was easy but understanding how it worked and making it more streamlined and user-friendly was challenging at first, but playing around with the respective functions and features made it more accessible.
Nebari is a very useful platform for data scientists and researchers to perform their job duties while not requiring a dedicated DevOps administrator. I look forward to making future contributions and seeing it improve.
PS: I want to thank my mentors Eskild Eriksen, Vinicius D. Cerutti and Amit Kumar for all the help and support. I have learned a lot of things from them. It was a really good and memorable experience working at Quansight.

